¶ Main page
When you log in for the first time you will see your main page looking like this:

Your main page contains two parts in it.
The first part and the one most easy to see it all files and folders tub which takes the majority of the page.

In it, you can see and navigate through all files and folder of all users that have access to you NextCloud.
You can also see all the information about the data you have (Size, Time modified, etc…)
One more important detail is a total number of files and folders as well as space consumption of those files in the bottom of the list.
¶ Navigation tab

In this tab, you can easily navigate through the files, and see only certain categories of them.
In this tab, you can navigate through the files, and see only certain categories of them.
All files – This will show you all files that you have permission to access or look into.
Recent – Will only show you your files that were recently added.
Shared with you – As its name say all files that are shared with you.
Favorites – Will show you all files that you set as favorite.
Shared with others – Are all the files you shared with other users.
Shared by link – Those files are all the files that you uploaded using a link, not old and hard way by uploading data.
Tags – Will show you all files that have certain tags.
Delete files – Will delete marked files.
Settings – Will allow you to see all hidden files and will provide you a link for WebUI of the NextCloud application.
¶ How to access files/folders
To access files/folders in NextCloud you must use different approach then you are used to.
First, you need to click on the file/folder you want to open.
When you do that pop-up window will appear in right side of the screen that will give you all the information about that particular file/folder.

We use the same procedure for opening files.
The only difference is that files with a format that is unknown to NextCloud will be downloaded directly to users personal computer while others will be opened directly within the application.
¶ Create new Folder/Text file
Creating new Folder/Text file in NextCloud is fast and easy.
Just click on the “+” icon it top of the files list and drop down menu will appear.
For example, click on the New Folder, then name it and press Enter to confirm.

After that, you will be able to see your new Folder in Folders/Files list.
¶ How to Upload file
The process is same as for creating Folders/Text files.
Just click on the “+” icon it top of the files list and drop down menu will appear.
Pick Upload from the list, pop-up window will appear in which you should choose files from your personal directory that you wish to upload.
When you confirm upload process will immediately start.

Your file will be visible in folders/files list after upload is complete.
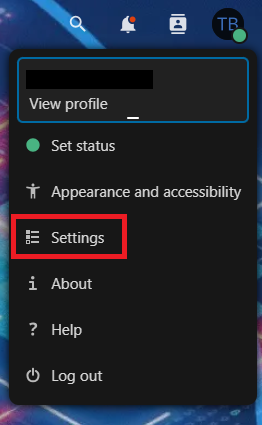
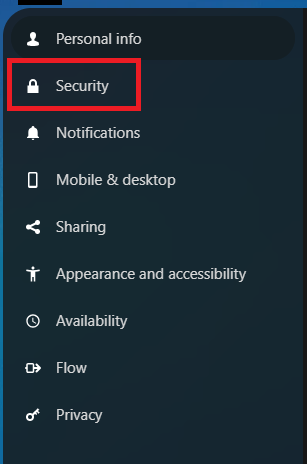
¶ MFA Authentication
Open the settings of your account :
Access to the Security Settings
Enable TOTP by clicking on the check button
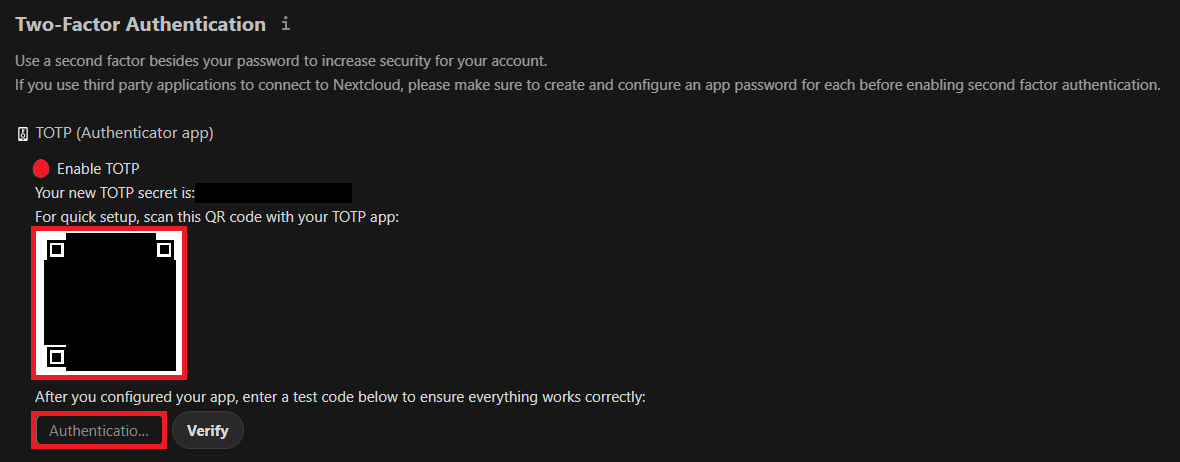
Now you have to scan the QRCode with you phone or enter the TOTP Secret and enter your temporary code in the Authentication Entry and click Verify, Now MFA is activated on your account